
Introduction
F13 Email is a multi-function plugin, features can be used independent of each other or any combinations of features can be used together.
Features:
- Send WodPress emails via SMTP server
- Custom form builder, form to email
- Email logging for all emails sent via WordPress
SMTP
Sending emails via the standard WordPress PHPMailer is useful but can result in outbound emails landing in the spam folder. With F13 Email you can configure WordPress to send emails via your own email account which helps reduce the amount of mail ending up in the spam folder.
Configuration
Configuring SMTP is simple if you know the settings for your email account. Most email providers will have a knowledgebase outlining the settings. Searching “My email provider SMTP settings” will usually return the information you require.
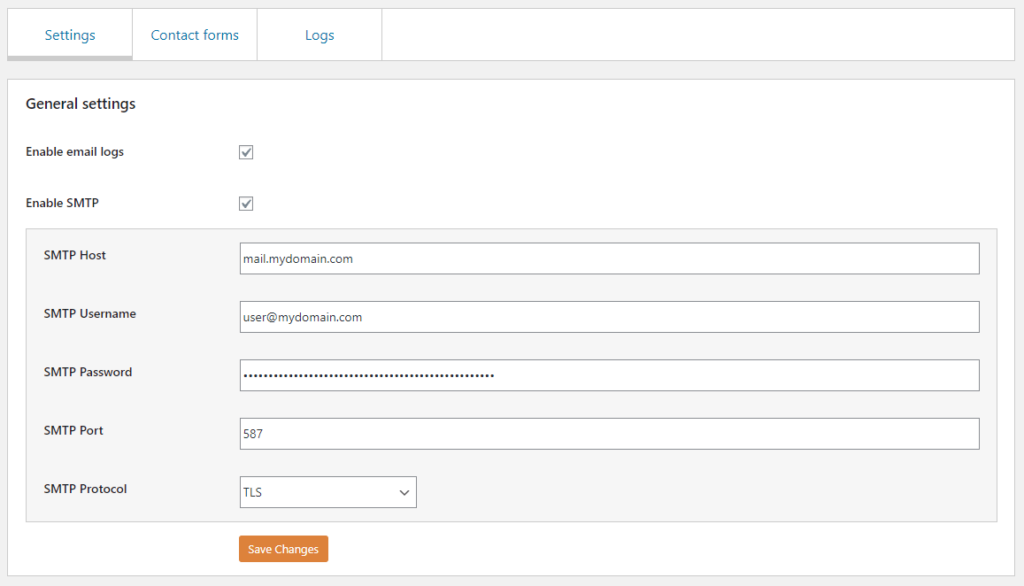
- Tick the “Enable SMTP” checkbox to display the relevant settings
- Enter the SMTP host (your email provider may have multiple hosts, if so se the one labelled “Outgoing” or “SMTP”)
- Enter your username, this is often your email address
- Enter you password, this is often the same password you use to log in to your email account, some providers may require you to create an application password
- Enter the SMTP port number, this is usually 587 for TLS or 465 for SSL
- Select the protocol used by your email provider
Testing
An inline SMTP test is planned for a future release. In the mean time, fill in a contact form on your website to check emails are being delivered.
Disabling
Should you wish to permanently or temporarily disable sending emails by SMTP. Untick the “Enable SMTP checkbox and click save. Your SMTP settings will remain saved ready for re-enabling but will not be used.
Forms
F13 Email includes a dynamic form builder. Forms can easily be created with any number of custom fields.
Field types:
- Checkbox
- Date
- Dropdown
- Number
- Radio
- Text
- Text area
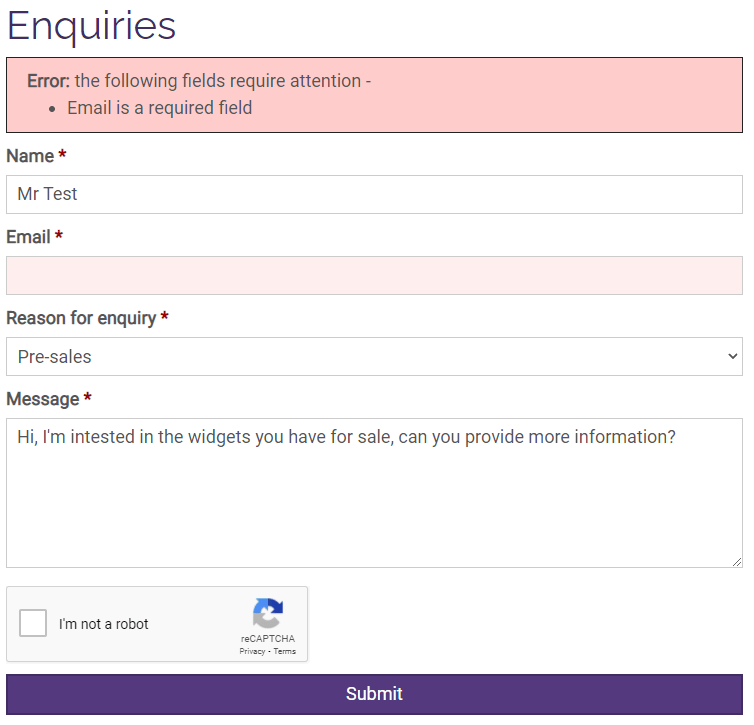
Each field can be marked as required or optional. Required fields will return an error if not completed, Optional fields will only return an error if an invalid input is provided; such as a number field containing text.
The current release will only send emails to the admin email address as set on your WordPress site. Plans are in place for future releases to allow a recipient email address to be set for each form.
Creating forms
To create a contact form, navigate to the settings page at “F13 Admin” > “Email” > “Contact forms” and click the “+” (Plus) button.
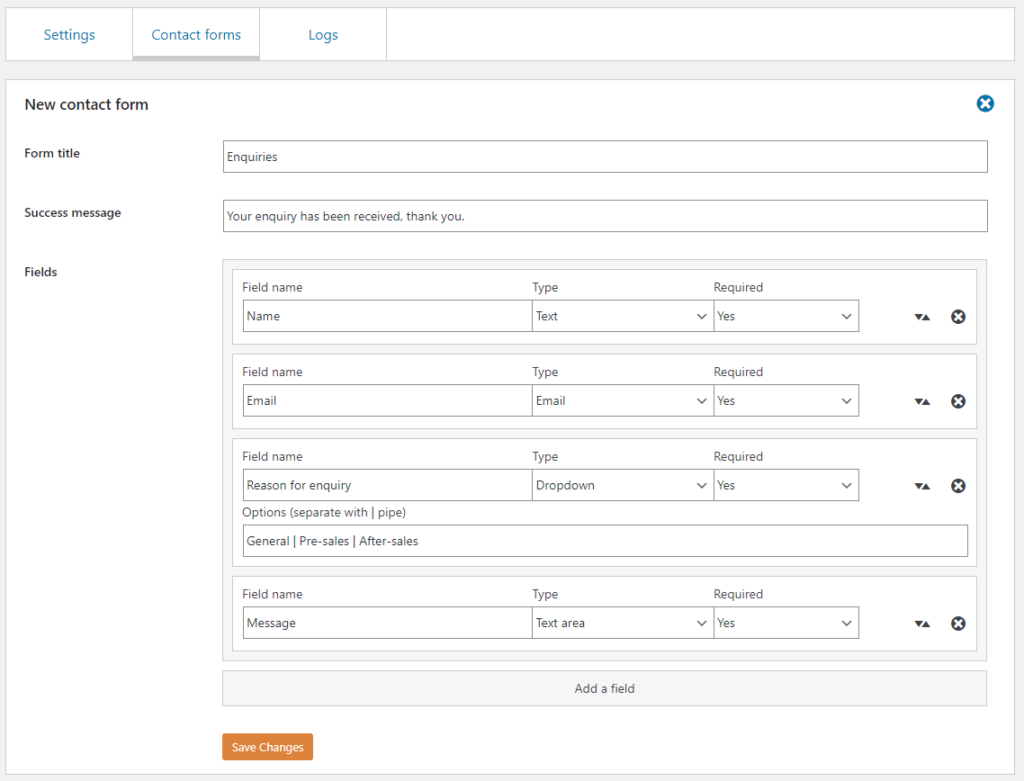
- Provide a title for your form, the title is only for identifying each form in the admin area and is not publicly visible
- Enter a success message, this is the message that is shown to your visitors once they have successfully submitted the form
- For each desired form field, enter a “Field name”, select a “Type” from the dropdown and decide if the field is required or optional
- For certain field types (Dropdowns and Radio), additional information is required. Enter the desired options separated by a pipe “|”
- option1 | option 2 | option 3 | option 4
- Click the “Add a field” button to add new fields to your custom form
- Click and drag fields to re-order them
- Click the X icon to remove a field
Modifying forms
Modifying forms is similar to creating a form, the only exception being that forms are edited by navigating to the settings page at “F13 Admin” > “Email” > “Contact forms” > “Edit”, where “Edit” is next to the form you wish to update.
Deleting forms
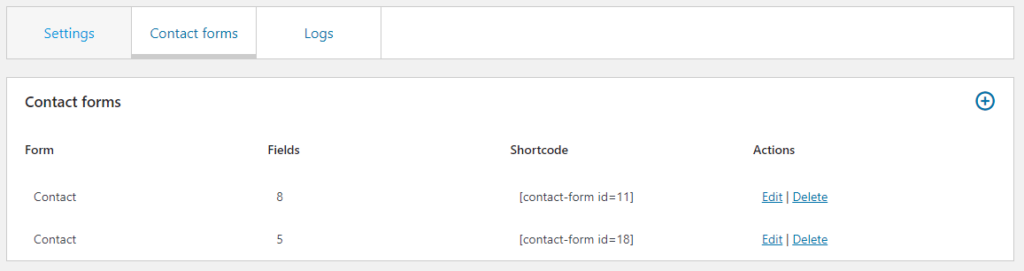
Navigate to “F13 Admin” > “Email” > “Contact forms” and click “Delete” next to the form you wish to remove.
Shortcode
Once you have created a form you will be provided with a simple shortcode to copy and past in the desired location, either on a page or post. For example [contact-form id=1].
Email logs
Email logging will store a copy of every email sent via WordPress into a table, allowing you to detect any unintended emails being sent from your server as well as having a trace of any emails that are sent.
Enable / Disable
Email logs can be enabled or disabled via the F13 Email settings page at “F13 Admin” > “Email”, simply check or uncheck the “Enable email logs” checkbox.
Viewing
To view the email logs for your site, navigate to “F13 Admin” > “Email” > “Logs”. Click an email to view the expanded (full) email text.
Screenshots

Installing
Installing is as simple as 1,2,3 –
Via WordPress
- Navigate to WP Admin > Plugins > Add New
- Search for “F13 Lightbox”
- Install and activate
Manual
- Download the source code
- Upload the “f13-email” folder to your “wp-content/plugins” folder
- Activate the plugin in WP Admin > Plugins
GitHub
Last commit: July 28, 2022 - 06:54pm
Forks: 0
Open issues: 0
Stars: 0
Watchers: 0
No comments on WordPress Plugin: Email